It is this time of the year, when those of you who have gardens, are quite busy...
I presume not all of you have huge garden where you have unlimited space for plants...
In the house we are renting, there is bit space for growing things, but unfortunately we don’t have much ‘sunny’ places... This may cause some difficulties... Another problem I have is just simply lack of pots and amazing amount of snails, which eat everything what is on the ground (except herbs)... I was very upset, when last year they made breakfast of my cucumbers, courgettes and spinach...
I have two lovely little kids, so I can’t use anything against snails, and crushed egg shell doesn’t seem to be working that good...
Because of the snails, and limited space, I decided to plant strawberries in hanging baskets (you can find them on e-bay). I was considering buying them, but making something like that by myself always gives me lot of satisfaction.
So today I will show you how to make those kind of baskets.
The biggest advantage of them is, that you can hang them outside on the wall – so you are not losing any space in the garden or patio. Probably they won’t prevent plants from snails a 100%, but it will definitely limit the amount of them, so plants will have much more chance to survive.
The whole procedure involves work with sharp equipment and fire,so it should be made only by adults or under adult’s supervision.
This is what you will need:
- Empty bag after turf/coal or any similar type
- Sawing machine or if you don’t have one a needle and thread
- Scissors
- Pen or marker
- Candle or tealight
1. Take the bag, rinse it and dry it.
You don’t really want any dust etc. ,when you will be working.
2. Put it on a flat surface (table), flatten it and bend it in half lengthwise.
3. Using pen or marker draw three lines – one in the middle and two on the sides – about 4 cm from the middle one.
4. Saw bags along two side lines. I would recommend to saw twice with two slightly different stitches. As you can see on the pictures I used two different colours, so you can see easily how it’s done, however normally I would use just one colour – doesn’t matter which one – stitches won’t be visible anyway.
5. Cut the bag along the middle line. Now you have two narrow hanging bags.
6.To prevent the cut edges from ripping, use a candle or tea light to melt the edges. If you can, do it in garden shed or outside. Make sure you will keep fire safety and don’t burn yourself. Melting plastic can be very hot.
7. Turn the bag inside out, so all stitches will be inside.
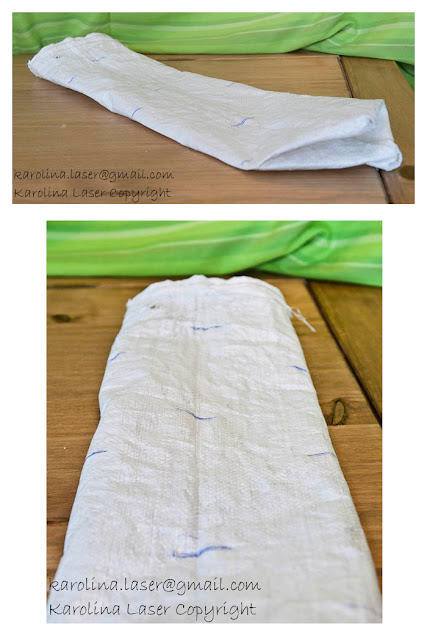
8. Now is the time to mark the spots with a pen or marker where you want the pockets for the plants . You can make them the way you see on the picture, or any way you want it. The amount of pockets will depend as well on what you want to plant. Some plants need more space, some need only a little bit. Basically you can make one raw of holes in front of the bag and two on the sides. Leave the site where is the stitch as back site.
9. Fold bag, like on the picture below.
10. Make cuts in the places where the pockets are going to be. As you go along melt cuts straight after cut, so the bag won’t rip apart.
11. Now your bag is ready.
PART 2 COMING SOON.


No comments:
Post a Comment